
This will be a nice and easy post to get through. Even Mark might enjoy this one! I thought that I should just share a couple of little computer-related things to make your life slightly easier every now and then.
Let's start with the Windows Task Manager—you know, that guy you pull up whenever something starts freezing and you want to shut it down quickly?
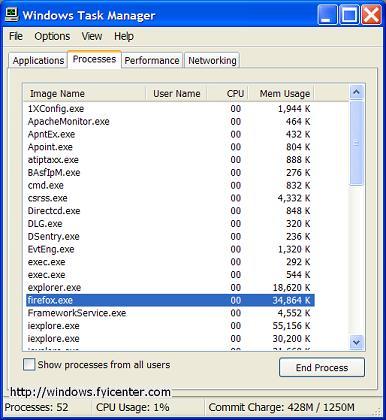
How do you specifically pull up the task manager? That's right, you probably press [Ctrl + Alt + Delete], wait for a bunch of options to come up, and then choose the task manager from the options. Well guess what? Just press [Ctrl + Shift + Esc], and the task manager will pop up much quicker! Try it.
Also, you know how sometimes you are rapidly churning out some document and you type a mistake, but you are typing so fast that you've already typed another 2-3 words? That really stinks, because the mistake was just close enough the where the cursor is that you don't want to bother wasting time to grab the mouse and move the cursor, but pressing either Backspace or the left arrow key is also wasting your time. Here is a tip that I use every day!! Hold Ctrl and press the left arrow button. Instead of moving the cursor backwards one character at a time, it will jump from word to word. Do you need to highlight a few words? Hold [Ctrl + Shift] and use the arrow keys and you'll jump all over. I also frequently make use of the Home and End keys, but those are no secret because they are right on the keyboard! The [Ctrl + arrow] trick works not only in Word, but pretty much any word processing or text-based program (even the blogger window that I am using to write this post)
Here is another trick. Pull up a Word document real quick. Type a paragraph of something, and then make a short list. Now click somewhere in the paragraph and hold [Shift + Alt] and press the right arrow button. That's a real quick way to add an indent. Do it again and you indent it further. While indented, hold down [Shift + Alt] and press the left arrow to return it to the un-indented state.
Now hop over to that list. Click anywhere in the last bullet point. Suppose you want to make that the first bullet point, how would you do that? Take your fingers off of the Ctrl + X!!! Instead hold down [Shift + Alt] and press the up arrow. You can also press the right arrow to make that point a bullet subset. Now click again on the paragraph at the top of your page, hold [Shift + Alt] and press the down arrow until the paragraph is actually below the bullet points. This trick works in all of MS Office.
Here is a quick tip for your browser. Press [Ctrl + L] to start typing in the address box. [Ctrl + K] will put the cursor in your search engine box. Practice it a couple of times and you'll find it very handy. This trick is very easy and very convenient.
Another browser trick: right click on tabs to get a set of options. I especially like the option: Close other tabs. If my browser gets cluttered with tabs, it's a quick way to "start all over" from the beginning. If you are on a tab and you want to close only that tab, press [Ctrl + W] on the keyboard and the tab will close. To open a tab that you just closed, press [Ctrl + T] and you'll get that tab back. You probably know that if you hit Backspace in a browser then it pulls you back to the page you were just visiting. I actually press Alt + left/right arrows to navigate forward and backward. To cycle between tabs, press [Ctrl + Page Up/Page Down]
Back to Word, if you want to jump to the top of the page, press [Ctrl + Home]. To make font sizes grow or decrease, highlight the text, hold Ctrl and press the open and close brackets [ ]. To make the view of the entire document larger or smaller (say, from 100% to 200% or 50%), hold Ctrl and move the scroll wheel on the mouse.
Last tip: to open up My Computer quickly, press [Windows button + E]. This tip is more handy than you might thing
Comments
Post a Comment